Can you use oil paint on paper?
Yes, you can!
There are 3 ways to paint on paper with oil paints:
- you can paint directly on watercolour paper. This is best for exercises and experiments where the longevity of your artwork isn’t important. Make sure to use thick watercolour, minimum 140 lb.
- you can paint on 140lb watercolour paper coated with 2 coats of gesso. Artist gesso is a primer. It will also protect the paper from the oil in the paint — the oil may cause the paper to degrade over time, and is important for professional artists, or if you want your painting to last.
- you can paint on paper made especially for oil paints. Oil paper does not need a protective layer of gesso. These papers are made in a special way that protects the papers from the oil.
Please note that some oil papers look just like watercolour paper, while others mimic the texture of canvas.
Also, it’s hard to tell watercolour paper from oil paper, so keep them separate in your studio. A friend gave me a sheet of oil paper to try, and now I can’t tell it apart from my regular watercolour paper sheets!
4 Reasons to paint with oils on paper
There are a few reasons that some artists like to paint on paper (me included):
1. Paper has a different texture
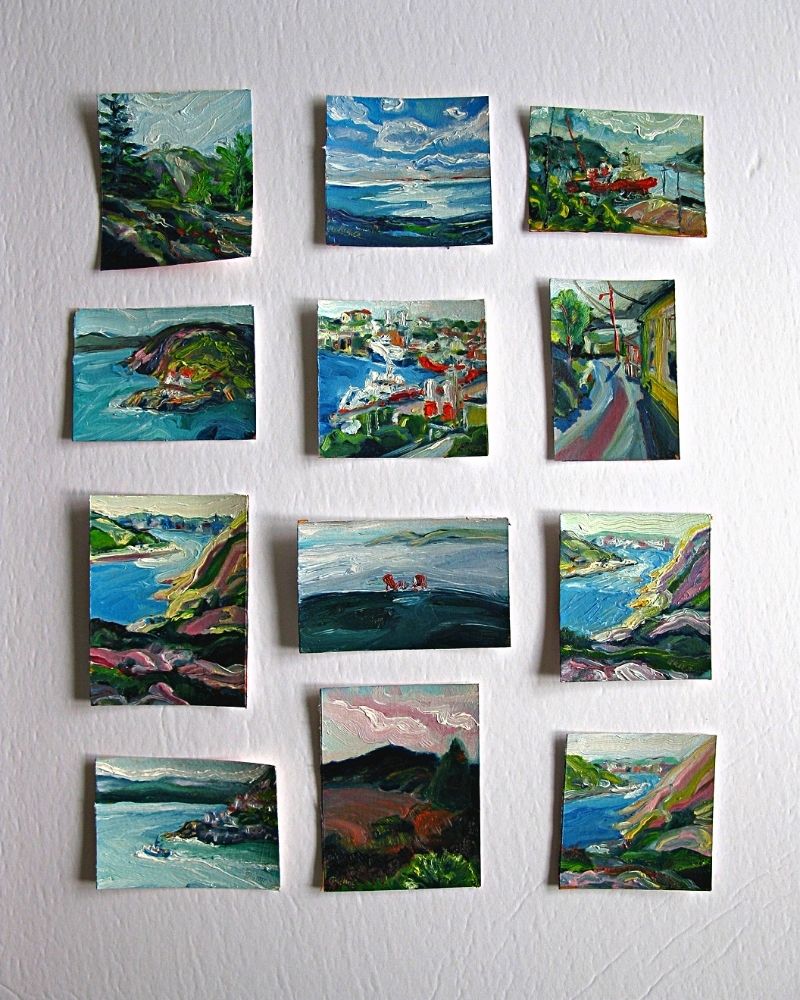
Paper made for painting is thick so that it won’t buckle. It’s also absorbent and textured. This will affect the speed of your brush strokes and how the final painting will look.
Note: if you coat your watercolour paper with gesso, it becomes smoother. Today artist’s gesso is made of acrylic paint, so it dries really fast.
2. Paper is less expensive than canvas
Paper is generally cheaper than canvas. This makes it a good surface to practice on. Painting on cheap surfaces allows us to feel free to paint the worst painting possible, and that’s a very liberating mindset!
Many artists feel anxiety when they stare at a blank new canvas. Professional-grade canvases or wood panels can be expensive. We don’t want to “ruin” them, so we get nervous!
This trepidation dampens our creativity. It also makes us “play safe” — that means we won’t be adventurous… we will stick to what we know works.
This isn’t a great mindset for beginners. When we are starting out, we should be exploring and stretching and pushing our limits.
We should be playing.
Both children and adults learn through play, so incorporating playtime into our our practice is a good thing to do.
Below is a timelapse of me painting an itty bitty #miniduma. This is watercolour paper with 2 coats of gesso. I mixed red acrylic paint into the gesso for the second coat to ting the gesso pink.
3. paper is great for experimentation and studies
Have you ever been painting when an idea pops into your head?
Example: “What if I tried adding green to this cloud?” Or “What if I smooth everything out with a palette knife?”
Then the idea won’t stop popping into your head?
When that happens, it’s time to get that idea out of your head and onto paper. And this is where cheap surfaces are your friend. If the experiment doesn’t work, it doesn’t hurt as much.
Professional quality supports can be expensive. If you’re painting on an expensive canvas or wood board, you may be hesitant to try new things because you think it might ruin the painting, and so you stick with the tried and true.
But practicing on paper is a great way to try all the crazy ideas that pop into your head. They may be leading you to your unique style.
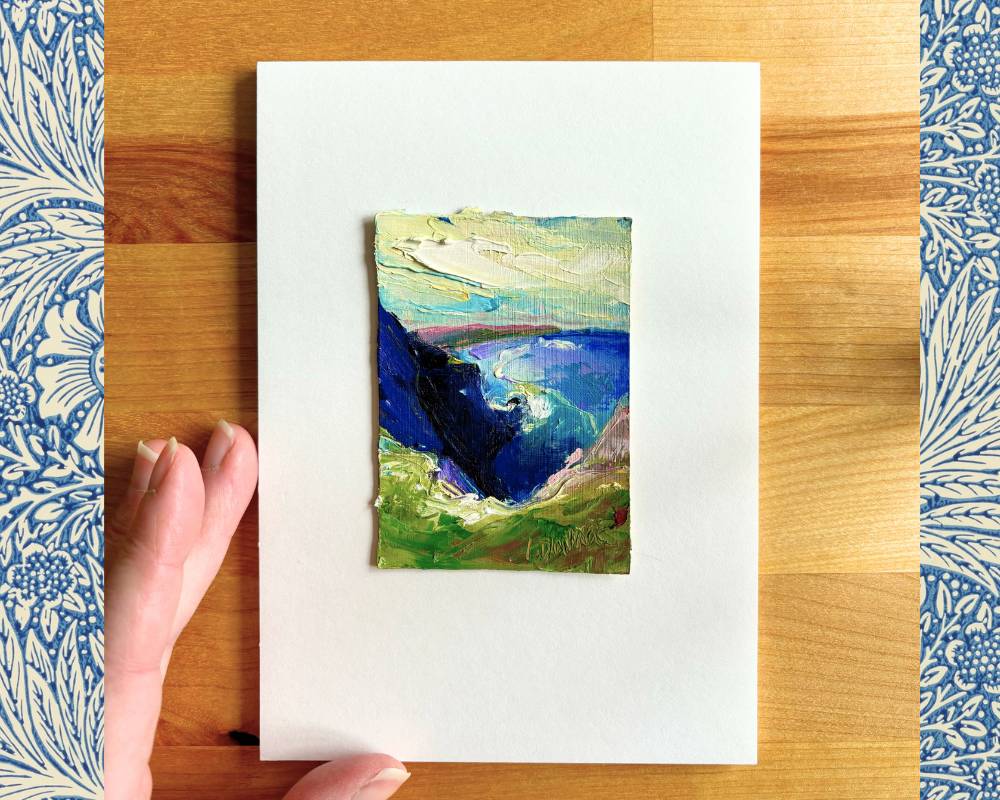
You can also use paper to
- make studies for larger work
- find colour combinations or harmonious palettes
- break out of a creative rut
#dumadoarttip I like to have small pieces ready to go in the studio. I use them to warm up before I start painting. When you pain small like this, it helps you see the big shapes of your final paitning.
I can also use up any paint left on my palette. I try to paint the same painting in as few brushstrokes as possible. I’m all about the energy.
#dumadoarttip: use paper to break out of a creative block
When I feel like I’m getting stuck or fearful, I will pull out my gessoed watercolour paper, put on my favourite music and just start playing with the paint. I try and pay attention to my first thoughts and then act on them. I don’t want to overthink- just do. I want to get back to that feeling of painting for pleasure.
It always works. Playing is magic.
When you’re not focusing on the outcome or worrying about wasting an expensive canvas, art time is really fun. And when you are having fun, your mindset will change from an anxious one, to one that is more relaxed and conducive to creativity.
4. Paper is more portable and easy to store
Paper is thinner and lighter than canvas, so it will take up less storage space. A plus for small spaces.
If you are traveling, do keep in mind that oil paintings take longer to dry. This means that if you want to return with your oil paintings and they aren’t dry yet, you may need to invest in special carriers.
How to paint with oils on specialty oil paper
Oil paper is ready to go. You don’t need any prep. You just need to choose how you will tape your paper to a hard surface for painting. See below for suggestions.
How to paint with oils on watercolour paper
If you don’t care about longevity, meaning you want to do an exercise or study that is not meant for display or sale, you can paint directly on the watercolour paper. Do make sure to get at least 140lb paper so it won’t buckle.
If you want to sell your work, or you want the texture of your paper to be be smoother, then you should use acid-free watercolour paper, and you should gesso your art first. This is to protect the paper from corrosion. We want our paintings to last a long time, especially if we are selling them.
Watercolour paper needs 2 coats of gesso to the front and the back. Gessoing the back will prevent the paper from warping. It will also make the paper stronger, more resistant to water damage, and also prevent stains or discoloration from appearing on the reverse side.
Tips for preparing watercolour paper for oil painting
Prepare many sheets of paper at one time. Batching will save time and it feels nice to have a stack of paper ready to go.
- Protect your table with newspaper or a drop-sheet and spread your papers out onto them.
- With a big house-paint brush or other synthetic brush, paint a thin coat of gesso on the front.
- Wait for it to dry — it doesn’t take long (~30 minutes). Modern gesso is usually acrylic based, so it behaves much like acrylic paint.
- Leave your brush in a jar of water so it doesn’t harden. Acrylic dries fast.
- When dry, paint another coat of gesso on the front.
- Let dry, then f lip the paper and repeat these steps to apply 2 coats to the back of the paper.
- After it’s dry, you can give it a light sanding if you want to make it smooth like wood Some people sand in between each layer, but that’s overkill for me. I tend to skip sanding on small paper sizes because I paint thick.
- When dry, you can tone your paper with a layer of acrylic paint, or oil paint. The oil will take longer to dry.
- Then cut the paper down to the sizes you want;
- Wash your brush right away with soap and water. Gesso dries fast like acrylic.
#dumadoarttip: You can tint your gesso before painting by adding acrylic paint to it. It will usually end up being a pastel colour because gesso is made with Titanium white pigment and is highly pigmented. You can also tone your paper with a layer of acrylic paint in any colour you please.
2 ways to tape your paper to a surface
When painting on paper, you will want to tape your paper to a hard surface. I usually use hardboard (Masonite) or thick cardboard. .
1. Tape all the way around your paper.
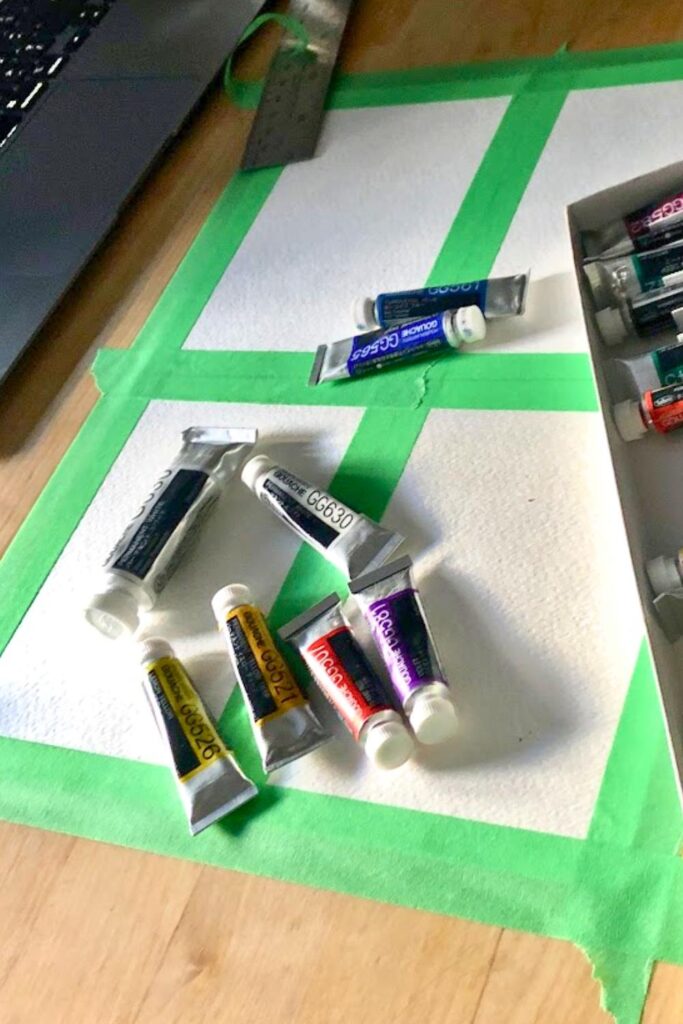
This will leave a clean edge around your art when you remove the tape. This is a technique watercolour painters use. When you frame you can either cover up the edge, or leave the white edge showing.
When you use this technique, make sure to use a low-tack artist’s tape. These are designed to hold the paper in place without causing damage to the paper or leaving residue when it’s removed. Regular masking tape is too sticky and may mar the surface of your paper when you take it off.
#dumadoarttip Try not to use green painter’s tape because the colour may influence you when painting. I used it in the photo above because I didn’t have low tack artist’s tape and I was in the mood for painting!
2. Mount using a hinge
If you want the paint to go right to the edge of the paper, you can mount your paper to a hardboard or cardboard using a hinge. I really like painting this way— the edge reminds me of deckled paper and I think it looks really nice when float mounted.
To achieve this final look, this is how I tape my paper to hardboard or cardboard to keep the front free of tape.
Watch the video to see the hinge mount in action and how I swap the painting out and put in a fresh piece of paper.
Instructions:
- cut the paper to your final size using a box-cutter (we called them X-acto knives growing up)
- have some hardboard (Masonite) or sturdy cardboard ready to tape the paper onto. It should be cut bigger than your painting
- cut 2 strips of artist tape the width of your paper. You can also use green or blue house painter’s tape here because it will be hidden. Don’t use masking tape as it may tear your paper when removed. We want a low-tack tape.
- flip the paper over so the back is facing you. Place one piece of low-tack tape at the top of the paper, so that half is on the paper, and half is off. Then do the same to the bottom.
- now flip the paper over, and place down on the Masonite or cardboard you prepared with the good side facing you. The sticky sides of the tape should be visible to you peaking from the top and bottom.
- cut 2 strips of tape longer than the pieces of green tape. You can use masking tape here because it won’t come into contact with the paper. Artist tape is more expensive than masking tape so you can save money this way. But avoid using coloured house painter’s tape as I mentioned above.
- with sticky side down, take your new strip of neutral coloured tape and place over the tape facing you. The tape should half is on the artist’s tape, and half on the hard surface. Make sure it does not to touch the paper. Give it a good press. Repeat with the bottom side.
- now your brush will be able to flow right off the edge of the paper.
- when dry, just peel your painting away gently from the tape.
If the tape is still sticky, you can reuse the tape. I usually can reuse it 3 times before it gets too weak.
When the tape loses its stickiness, just peel off the tape from the hard surface and start again.
Framing oil paint on paper
Normally oil paintings do not need to be framed behind glass because the oil cures to hard and impermeable finish. But because we are painting on paper, it’s probably best to frame your art behind glass, especially if paper is showing through. Paper is not as strong as canvas.
To frame, just follow the same techniques you would use with a watercolour painting:
Using a matte for framing paper
There are 2 ways to use a matte:
1. Cover the edges of your art with a matte that is cut just a bit smaller than your artwork. Your art and matte will be behind glass, and therefore protected.
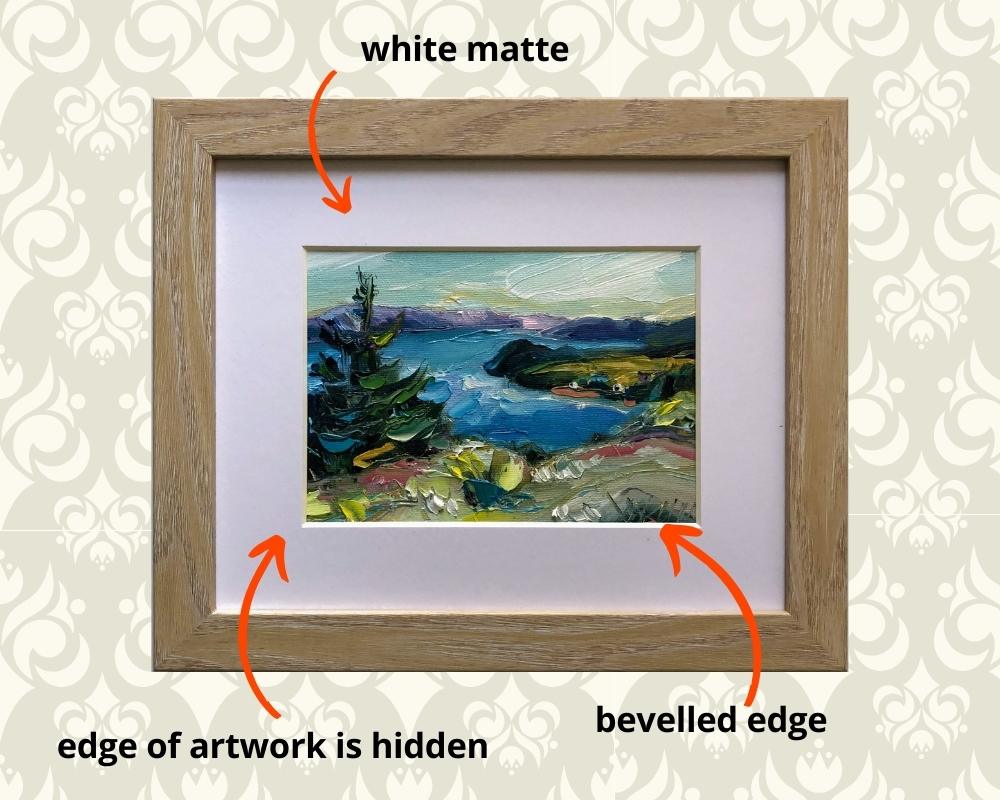
If you want to buy standard-sized mattes, then cut your paper to fit. Standard sizes will usually be less expensive. Make sure to buy acid free mattes. Anything touching your original artwork should be acid-free to protect it.
| Frame and matte size | Matte 0pening | Cut your paper |
|---|---|---|
| 8″ x 10″ | 4.5″ x 6.5″ | 5″ x 7″ |
| 11″ x 14″ | 7.5″ x 9.5″ | 8″ x 10″ |
| 16″ x 20″ | 10.5″ x 13.5″ | 11″ x 14″ |
| 20″ x 24″ | 15.5″ x 19.5″ | 16″ x 20″ |
2. If you used tape on the front of your artwork, and now have crisp clean edges, you can show the white border. But you can also hide it like the framing option above.
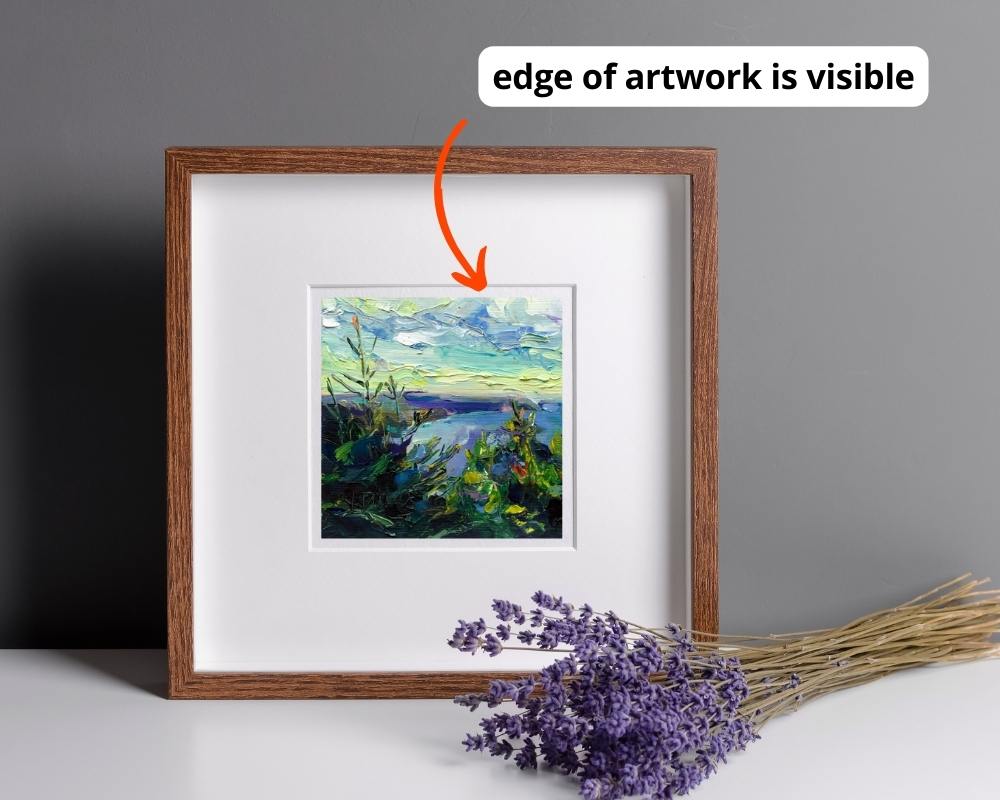
Float mounting
If you painted to the ege of your art and have a somewhat deckled edge, I think it looks really nice float-framed. The art is taped to acid-free backing board and the edges are seen. You can make it lie flat, or you can have the art raised a bit on a pedestal.
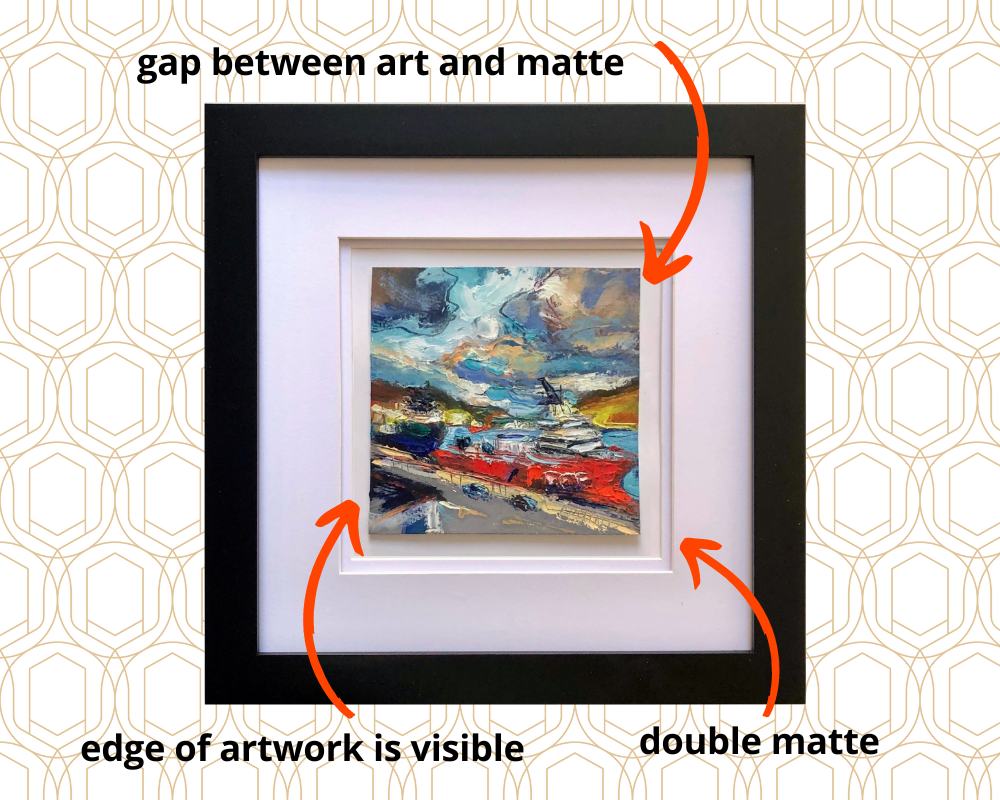
When you float-mount your art, your art doesn’t need a matte.
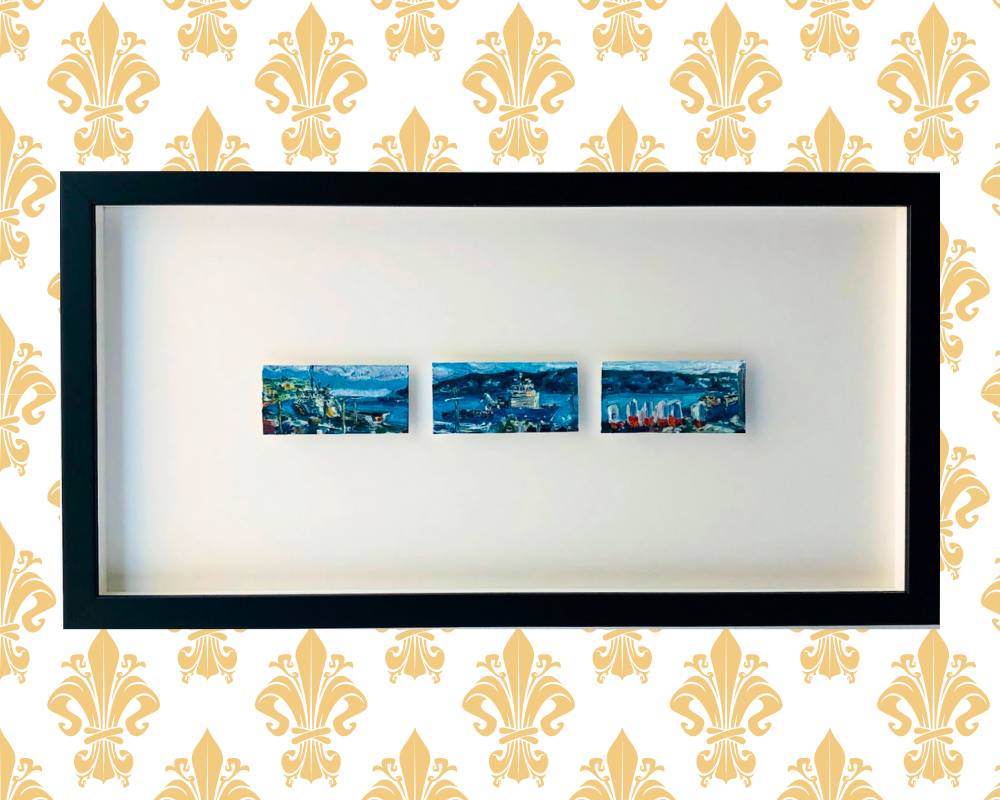
Below is how I framed a triptych of mini paintings. The paintings are mounted on a pedestal, which means they are raised a bit. The framer used bits of acid-free foam core to raise the art. The frame is deeper than a traditional frame, but not quite the depth of a shadow box. Make sure the art doesn’t touch the glass — condensation can ruin our art.
So, that’s it. I hope I’ve convinced you to give oil paint on paper a try! Remember, you won’t know until you try!
Final word: whether for practicing, or for selling, paper is a fun medium to paint on with oil paints.
Please note, some of these links are affiliate links which means that if you make a purchase, I will receive a small commission at no extra charge to you, but which helps keep the blog free.
Paper made especially for oil painting:
- Strathmore papers: good for beginners, not too expensive
- Arches brand is premium 100% cotton rag paper. Best for experienced painters or pros.
Check out the oil painting supplies I recommend for beginners. Just 4 things to buy!
If you’re ready to learn oil painting in a fun and friendly way, join me inside my itty bitty Intro to Oil Painting course. With my Duma Do Art Process, you will have a complete road map that will lead you to mastery.
Fascinating and great details for painting with oils on properly gessoed
Paper. I love my oils and yet, In twenty years my linen canvases abet pricey.
Paper also provides a more relaxed look when framed.
Most informative and relatable. Terrific Job.